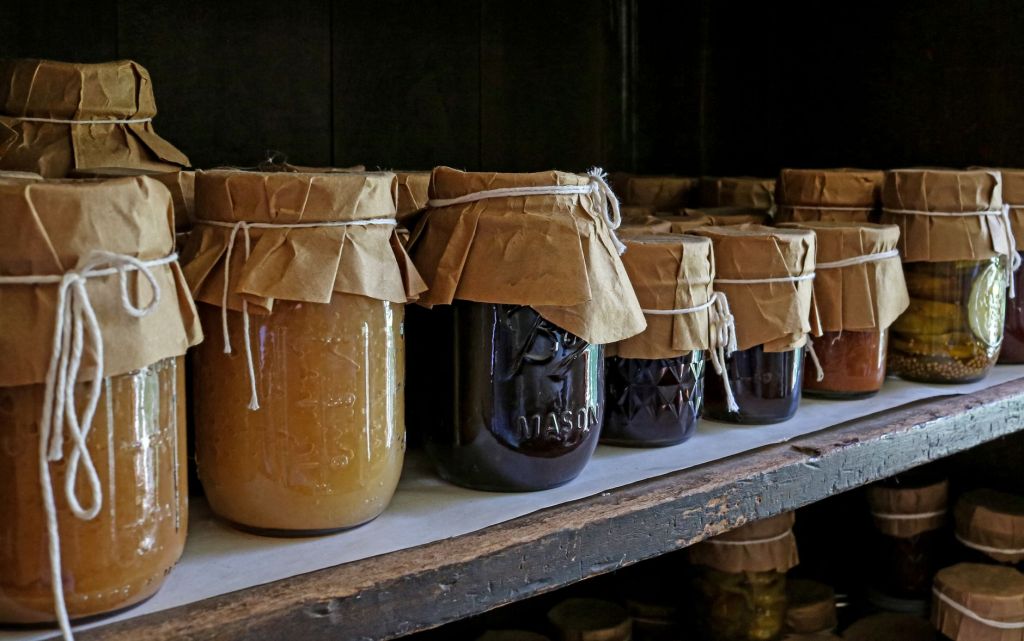
There is an unmatched sense of fulfillment that comes from looking at a pantry shelf lined with colorful jars of food that you preserved with your own two hands. To us, Canning is the ultimate art of capturing a season and saving it for a rainy day, and the key to becoming self-reliant.
For beginners, the world of canning can feel quite intimidating. You might have heard whispers of “canning safety” and felt a bit hesitant to start. But just like learning to build a campfire or sharpen an axe, canning is simply a skill rooted in physics, science, and a few golden rules. Once you understand the why behind the methods, you can fill your pantry with absolute confidence. That’s why we are stepping in to help.
Below is your beginner’s map to the two safe, approved forms of home canning. Let’s get started.
Method 1: Water Bath Canning (High-Acid Foods)
What it is: This is the gentlest and most common starting point for beginners. Jars are filled, capped with two-piece lids, and completely submerged in a large pot of rapidly boiling water (212°F / 100°C) for a specific amount of time.
- What you can preserve: High-acid foods (pH of 4.6 or lower). This includes most fruits (like peaches, berries, and apples), jams, jellies, pickles, relishes, and salsas.
- The Benefits: It requires very little specialized equipment—just a large, deep stockpot with a rack on the bottom, jars, and lids. It’s an incredibly rewarding, colorful, and forgiving introduction to food preservation.
- Things to Watch Out For:
- The Acid Crux: Water bath canning relies on a combination of heat and high acidity to keep food safe. The boiling water kills yeasts, molds, and standard bacteria, while the natural acid prevents dangerous spores from ever waking up.
- The Tomato Trap: Modern tomatoes sit right on the edge of the safety line for acidity. Because of this, you must add bottled lemon juice or citric acid directly to your jars when water-bath canning tomatoes to ensure they are safely acidic.
Method 2: Pressure Canning (Low-Acid Foods)
What it is: Because low-acid foods lack the natural armor of acidity, boiling water isn’t hot enough to make them safe for room-temperature storage. They must be processed in a heavy, sealed pressure canner. By trapping steam under pressure, a pressure canner coaxes the temperature up to a blistering 240°F–250°F (115°C–121°C).
- What you can preserve: Low-acid foods (pH above 4.6). This includes all fresh vegetables (like green beans, corn, and carrots), meats, poultry, seafood, bone broths, and stews.
- The Benefits: This is where true food independence happens. Pressure canning allows you to preserve entire, ready-to-eat meals, rich stocks, and the bulk of your summer vegetable garden without relying on a freezer.
- Things to Watch Out For:
- The Shadow of Botulism: Clostridium botulinum is a common, harmless spore found in soil. However, when trapped in a warm, moist, oxygen-free environment (like a sealed mason jar) without acid, it thrives and creates a dangerous toxin. The only way to destroy these spores in low-acid food is with the intense heat of a pressure canner. Never try to water-bath cook vegetables or meats.
- Equipment Clarification: A modern pressure cooker (like an Instant Pot or small countertop cooker) is not a pressure canner. True pressure canners are large, heavy-duty pots designed specifically to hold a steady pressure and a safe volume of jars to guarantee the food is heated all the way through to the core.
The 3 Golden Rules for Absolute Beginners
1.Trust the Science, Not Grandma’s Recipe:
The golden rule of modern canning is to only use research-tested, science-backed recipes (like those from the USDA Complete Guide to Home Canning or the National Center for Home Food Preservation). Old-fashioned, “inherited” recipes often lack the precise acid or timing measurements required to guarantee safety.
2.Mind Your Headspace:
Every recipe will tell you exactly how much “headspace” (the empty air gap between the top of the food and the rim of the jar) to leave. This gap is crucial; it allows the food to expand as it boils and ensures a strong, clean vacuum seal as the jar cools.
3.Know Your Altitude:
Water boils at lower temperatures the higher up you go. If you live more than 1,000 feet above sea level, you must adjust your processing time (for water bath) or your pounds of pressure (for pressure canning) to compensate.
Check out the chart below:
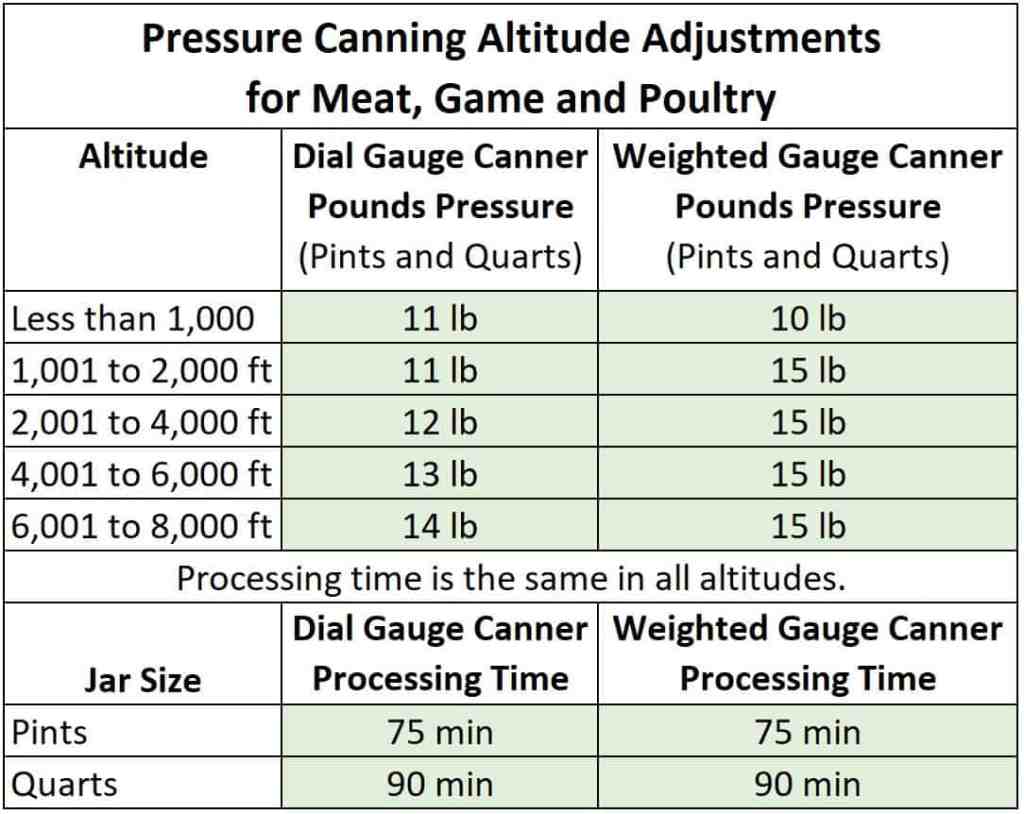
Mastering Your Altitude: Dial vs. Weighted Gauges Because water boils at lower temperatures the higher you go, you must adjust your pressure canner to compensate for your elevation. First, find your home’s altitude. If you are using a dial-gauge canner (one with a clock-like needle face), you will process your jars at 11 pounds of pressure if you live under 2,000 feet, and increase it by 1 pound for every higher bracket. If you are using a weighted-gauge canner (one with a heavy metal weight that rocks or jiggles), your adjustments are even simpler: you will use the 10-pound weight if you live below 1,000 feet, and automatically swap to the 15-pound weight for any elevation above that. Taking a quick moment to verify your altitude ensures the internal temperature of your canner safely reaches that magical, bacteria-destroying 240°F mark!
The Secret to a Perfect Seal: The Vinegar Wipe Before you place your two-piece lids onto your filled jars, there is one small, unskippable step that veteran canners never miss: dipping a clean cloth or paper towel into plain white vinegar and giving the rim of every jar a thorough wipe. As you ladle in your jams, fruits, or broths, microscopic drops of sugar, fat, or salt inevitably splash onto the glass rim. If left there, they act like a tiny barrier, preventing the rubber compound on the lid from making direct, flawless contact with the glass. Wiping with vinegar does two things—the acidity cuts right through stubborn grease and sticky residues, and it leaves you with a pristine, sterile surface. Taking those extra five seconds guarantees that satisfying, distinct pop of a successful vacuum seal every single time.
The Digital Hearth Reminder: Canning isn’t about perfection; it’s about joining a long lineage of people who looked at a seasonal abundance and said, “Let’s save a piece of this for later.” Start small—maybe with a single small batch of strawberry jam or pickled banana peppers—and watch your confidence grow with every satisfying pop of a sealing lid.
Tell us in the comments: Have you ever tried canning before? If you’re a beginner, what is the first jar you want to put on your pantry shelves this year?
Warm Wishes & Happy Canning!
The Buttermilk & Burlap Family
References
National Center for Home Food Preservation. (n.d.). How do I… Can. University of Georgia Cooperative Extension. https://nchfp.uga.edu/how/can
U.S. Department of Agriculture. (2015). Complete Guide to Home Canning (Agriculture Information Bulletin No. 539). National Institute of Food and Agriculture.
Image Credit: https://www.awesomecookingideas.com


Leave a comment